First run
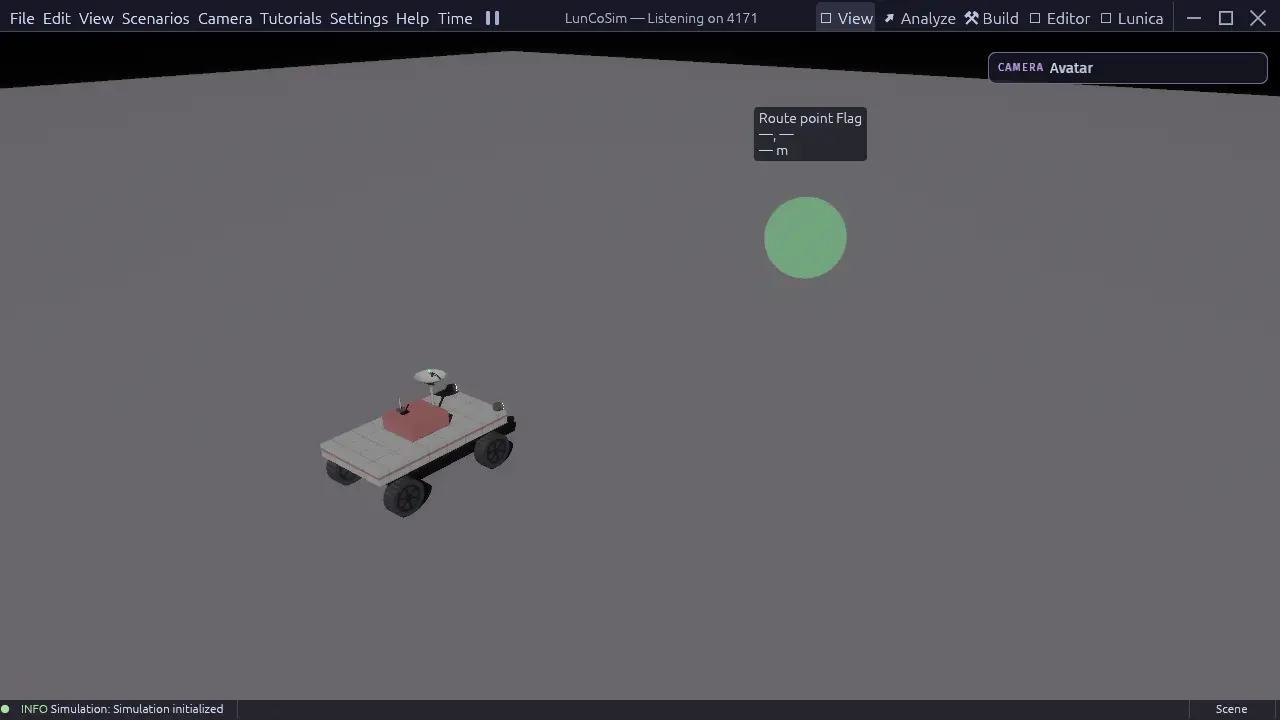
When LunCoSim opens, you are looking at a workbench, not a single fixed editor. The same Twin can be viewed as a running mission, a scene assembly, a graph dashboard, a USD document, or a Modelica model. The first run is about learning where those views are and how to open a working scene.
The window
| Area | What it does |
|---|---|
| Title bar | File, Edit, View, Window, and Help menus; command palette; transport; perspective tabs |
| Viewport | The live 3D scene, selection, camera, and ground interaction |
| Side panels | Twin files, Entity tree, Inspector, Environment, Spawn, Telemetry, Ports |
| Bottom dock | Graphs, timelines, logs, and document tabs |
| Status bar | Update notices, simulation state, and transient messages |
The exact panels depend on the active perspective. View → Reset Layout restores the authored default for the current task.
Perspectives
Choose a perspective from the title bar or View → Perspectives:
| Perspective | Use it for |
|---|---|
| ◉ View | Operating the live mission in a full-window scene |
| ⚒ Build | Composing the scene from assemblies, entities, and the Twin's files |
| ↗ Analyze | Comparing signals in Graphs, with Telemetry and Ports |
| ✎ Editor | Editing one explicit USD document in an isolated preview |
| ∿ Lunica | Modelica text, diagrams, compilation, and experiments |
Switching perspectives preserves the Twin and the simulation. You are changing the layout and the visible tools, not restarting the world.
For a detailed tour of each task and its controls, see Perspectives.
Open the tutorial catalog
The authored lesson catalog is under Scenarios → Tutorials. Tracks include Start Here, LunCoSim, How It Works, Navigation, Sandbox, Rover Driving, and Modelica.
Each entry is a tour, an exercise, or a challenge:
- A tour explains where things are. It advances with Next and Back and does not certify that you performed an action.
- An exercise advances only when the simulation observes the requested result.
- A challenge is a longer open-ended task.
Selecting a lesson loads its authored scene when the lesson needs one, then starts the lesson's Rhai scenario. This is the easiest way to see a working Twin without building one first.
First five minutes
- Open Scenarios → Tutorials → Start Here → Lunar Rover Lab for the full 30-minute classroom exercise, or Scenarios → Tutorials → Sandbox → First Drive for a five-minute rover drive.
- Wait for the scene and the lesson card to settle. The viewport shows the practice yard; the card explains the current step.
- Click Take control. Selection is not control: you must claim the rover before your input reaches it.
- Drive with the displayed bindings. The defaults are W/S
for forward and reverse, A/D to steer, and
Space to brake. The lesson uses
input_hint(...), so it always shows the bindings currently configured on your machine. - Follow the on-screen objective. When you reach the marker, stop inside it. The lesson checks the simulation state, not a timer.
If the rover rolls over, use Right rover. If you lose the view, use Return camera. Both actions preserve lesson progress.
The empty viewport
A new session may start with an empty persistent world shell. That is expected: the sandbox is an explicit scene or lesson, not an implicit startup default. Use the viewport actions to open the featured lesson, choose a recent Twin, or open a scene from the Twin browser.
A Twin without default_scene opens as a file browser rather than mounting a
world. That is also expected; the manifest has not selected a stage. See
Twins and twin.toml.
If you get stuck
| Symptom | Check |
|---|---|
| The vehicle ignores your input | Click Take control first; selection is not control. |
| The viewport is empty | Open a scene or lesson; a Twin with no default_scene does not mount a world. |
| An asset is missing | LunCoSim asks before downloading declared external assets. See Assets.toml. |
| The app will not start on a port | Choose another free --api port. |
| A lesson card does not advance | Read the current objective; an exercise waits for the simulation, not for a click. |
Next steps
Continue with First mission for the suggested learning path, or read How it fits together to understand what the lesson is doing behind the scenes. For the complete keyboard and camera reference, see Controls.